Stage 4: Enhance

Add the bells and whistles
Enhance is the optional stage in this tutorial. Once you have completed stages 1-3, you know how to implement HTML and CSS. However, there are some fancier elements you can add that will elevate your website. The following sections demonstrate just a few options to enhance your portfolio site.
Icons make it easier to navigate to different pages or sections. For example, this website uses icons in the top navigation bars to demonstrate what each stage entails. In order to start using icons, follow the instructions to sign up for Font Awesome.
Font Awesome installation:
1. Go to fontawesome.com and click Start for Free.
2. Enter your email address, agree to the Terms of Service, and click Send Kit Embed Code.
3. Check your email inbox and click the button that says Finish Setting Up Your Account.
4. Enter your new password and click Set Password & Continue.
5. Finish the rest of the questions about your information and click Let's go!.
6. Click the button that says Set up icons in a project with 1 line of code. Copy this line of code and add it to your<header> section of the desired HTML file you're working in:
<script src="https://kit.fontawesome.com/fd8c9ffdf6.js" crossorigin="anonymous"></script>
Now you can use all of Font Awesome's icons! Let's start implementing some.
Implementing icons:
1. From the main menu, click Icons.
2. In the search bar, enter "Person." A few options show up, but let's select the first one (the free version, not denoted "PRO").
![]()
3. Once you have the desired style of your icon figured out, copy the HTML code at the bottom of the screen. Here's what the code for a green person icon looks like:
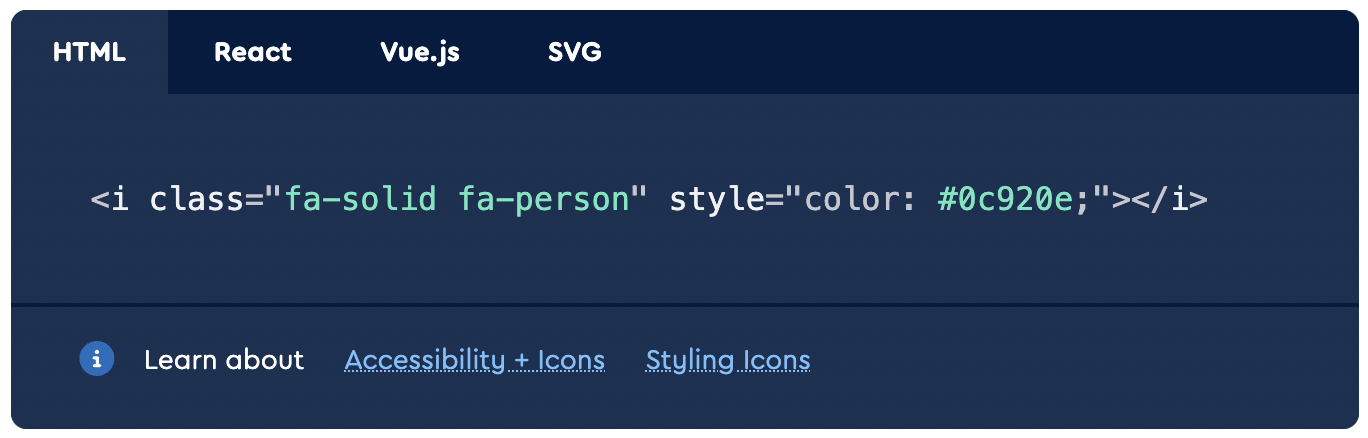
4. Paste this icon with the opening and closing <i> (icon) tags where you want it. Save the file you're working in and view the added icon locally. You can delete this now, if you'd like.
Now you can start adding your own icons!
Tables are an easy way to organize information. For example, let's say you want to list out the courses you've taken. Here's an example:
| Class | Term | Grade |
|---|---|---|
| Computer Science | Fall 2022 | B+ |
| English | Winter 2021 | A- |
Tables include 4 main HTML tags that can be styled by CSS elements. These are: <table/>, <tr/> (table row), <th/> (table header), and <td/> (table data).
This table has three columns, with the table headers as Class, Term, and Grade. Copy and paste the following code to add a table into your website:
HTML code:
                    <table>

                     <tr>

                      <th>Class</th>

                      <th>Term</th>

                      <th>Grade</th>

                     </tr>

                     <tr>

                      <td>Computer Science</td>

                      <td>Fall 2022</td>

                      <td>B+</td>

                     </tr>

                     <tr>

                      <td>English</td>

                      <td>Winter 2021<td>

                      <td>A-</td>

                     </tr>

                    </table>
CSS code:
                      table{

                         font-family: helvetica;

                         font-weight: 200;

                         font-style: normal;

                         font-size: 1.1em;

                         text-align: left;

                         line-height: 1.6;

                         color: black;

                         border: 1px solid;

                         width: 100%;

                      }

                      td{

                         border: 1px solid;

                         height: 30px;

                         padding: 5px;

                      }

                      tr{

                         border: 1px solid;

                         height: 30px;

                         padding: 5px;

                      }

                      th{

                         border: 1px solid black;

                         height: 30px;

                         padding: 5px;

                         background-color: #3498db;

                         color: white;

                      }
Feel free to add/delete columns or rows and edit the CSS code snippet to the styling of your choice! Save your changes by clicking File > Save or the Cmd + S keyboard shortcut. Then push and commit your changes to GitHub.
Responsive image galleries can be an effective and interactive way to display multiple images on the same page. Here's an example, using three stock images, courtesy of Pexels.com:


This gallery only has three images, but feel free to add as many as you'd like. Copy and paste the following code to add a scrollable image gallery into your website:
HTML code:
                    <div class="scroll-container">

                     <img src="" alt="">

                     <img src="" alt="">

                     <img src="" alt="">

                     <img src="" alt="">

                    </div>
CSS code:
                    div.scroll-container {

                       background-color: #333;

                       overflow: auto;

                       white-space: nowrap;

                       padding: 10px;

                    }

                    div.scroll-container img {

                       padding: 10px;

                       width: 100%

                    }
Add in the correct values in the HTML image tags for the src and alt attributes.
src attribute should reference the path where the image is located. For example, if the image is in your index.media folder, the path would be something like "index/index.media/{imagename}.png". And the alt attribute stands for alternative text.Adding buttons that bring users to you social media accounts can be a fun way to enhance your website and experiment with iconography.
You can create different types of buttons: squares (or rectangles), rounded corners, and circles. Luckily, Font Awesome has a ton of social media logo icons for us to use! Let's use LinkedIn as an example. Copy and past the following code into your HTML and CSS files to add a social media button:
HTML code:
<a href="" class="btn"><i class="fab fa-linkedin" style="color: #ffffff;"></i></a>
CSS code:
                  .btn {

                     background-color: #3498db;

                     border: none;

                     color: white;

                     padding: 12px 16px;

                     font-size: 16px;

                     cursor: pointer;

                     border-radius: 0%; /* 30 or 50 */

                  }

                  .btn:hover {

                     background-color: #0703d0;

                  }
For the href property in the link, copy and paste the URL of your LinkedIn account between the quotations. In addition, feel free to change the colors in the CSS to whatever you'd like. There is one color for the button itself (blue), and another color for when you hover over a button (darker blue).
border-radius property to 30 (rounded corners) or 50 (circle), if you'd like. And make sure to swap out the entire opening and closing <i> (icon) tag when you choose a different social media icon!
Instead of a solid background color, CSS allows you to define gradients and display smooth transitions between two or more colors.
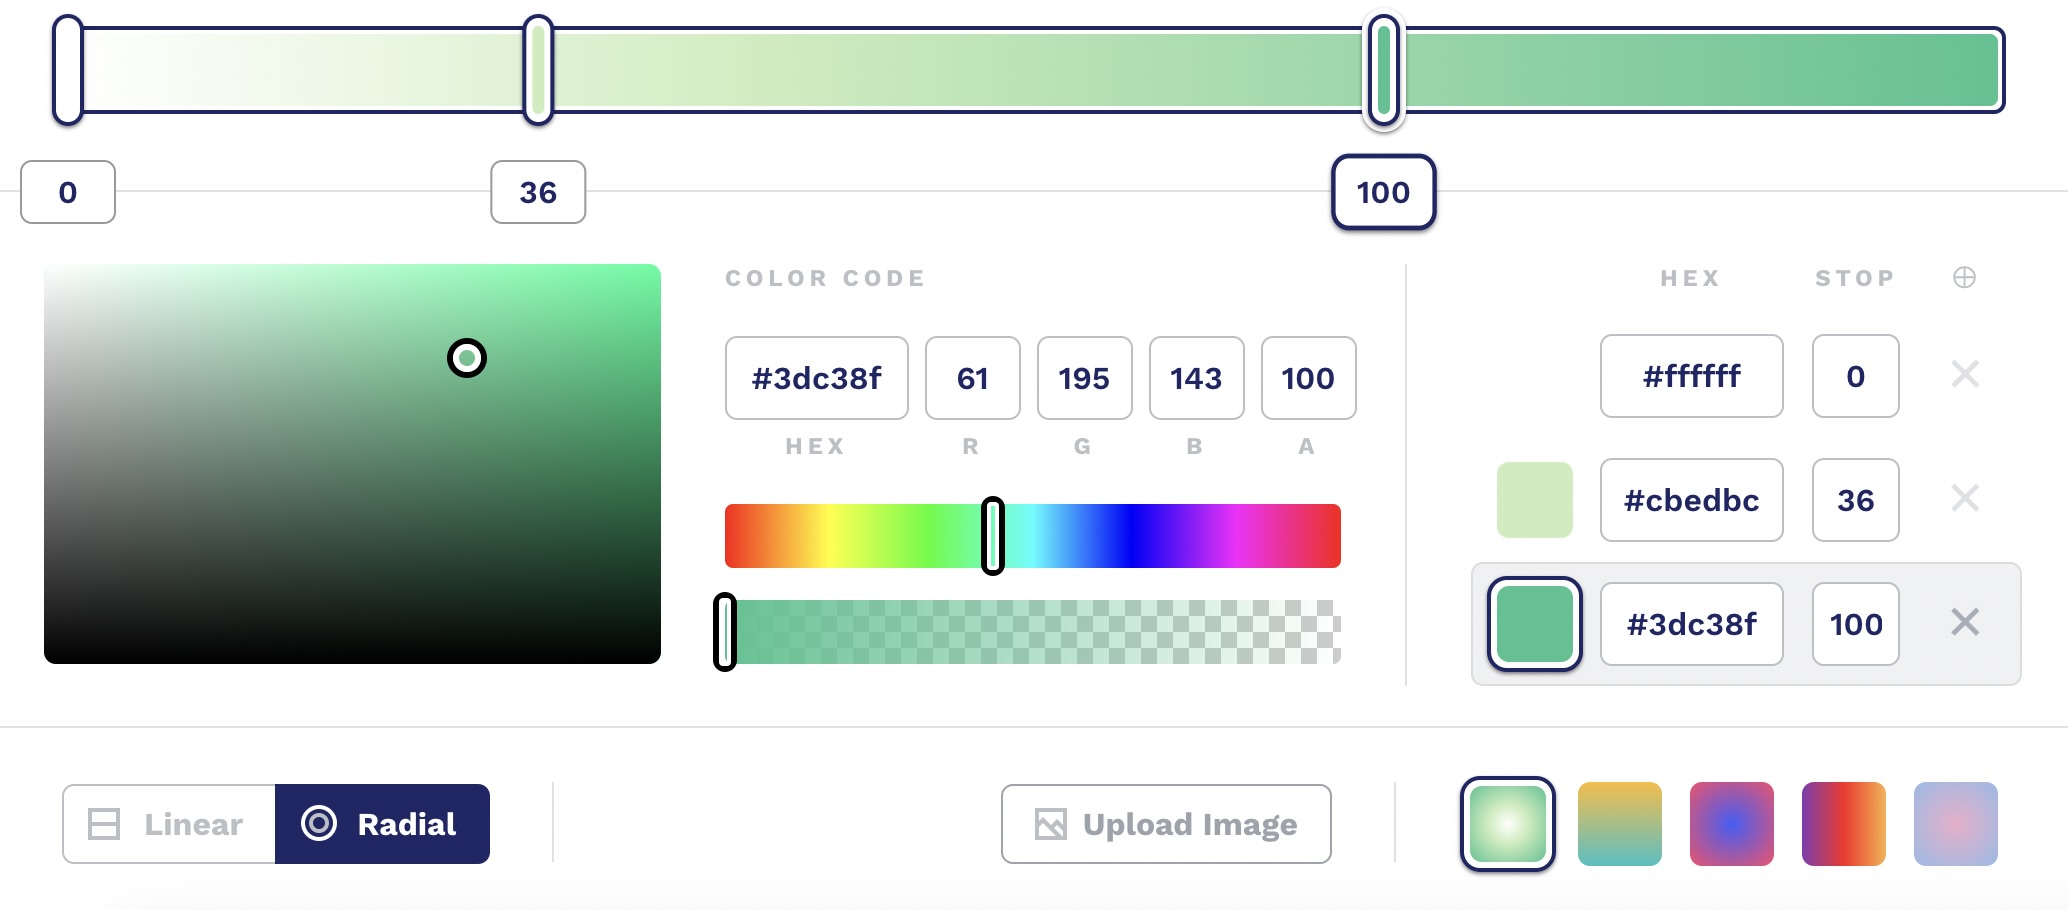
There are two different types of gradienets you can create: linear and radial. Luckily, there's a super helpful online tool that helps you pick out gradients and see what looks best.
1. Go to CSSGradient.io.
2. Experiment with linear and radial gradients. You can add more colors by simply clicking the color bar at the top of the page:

3. Input a particular hex color code you want, or choose colors from the color picker. You can even change the opacity.
4. Once you have a gradient picked out, copy and paste the two background properties and paste them into the html, body element in your CSS file. Make sure to replace (or comment out) whatever you had set for the background, previously.
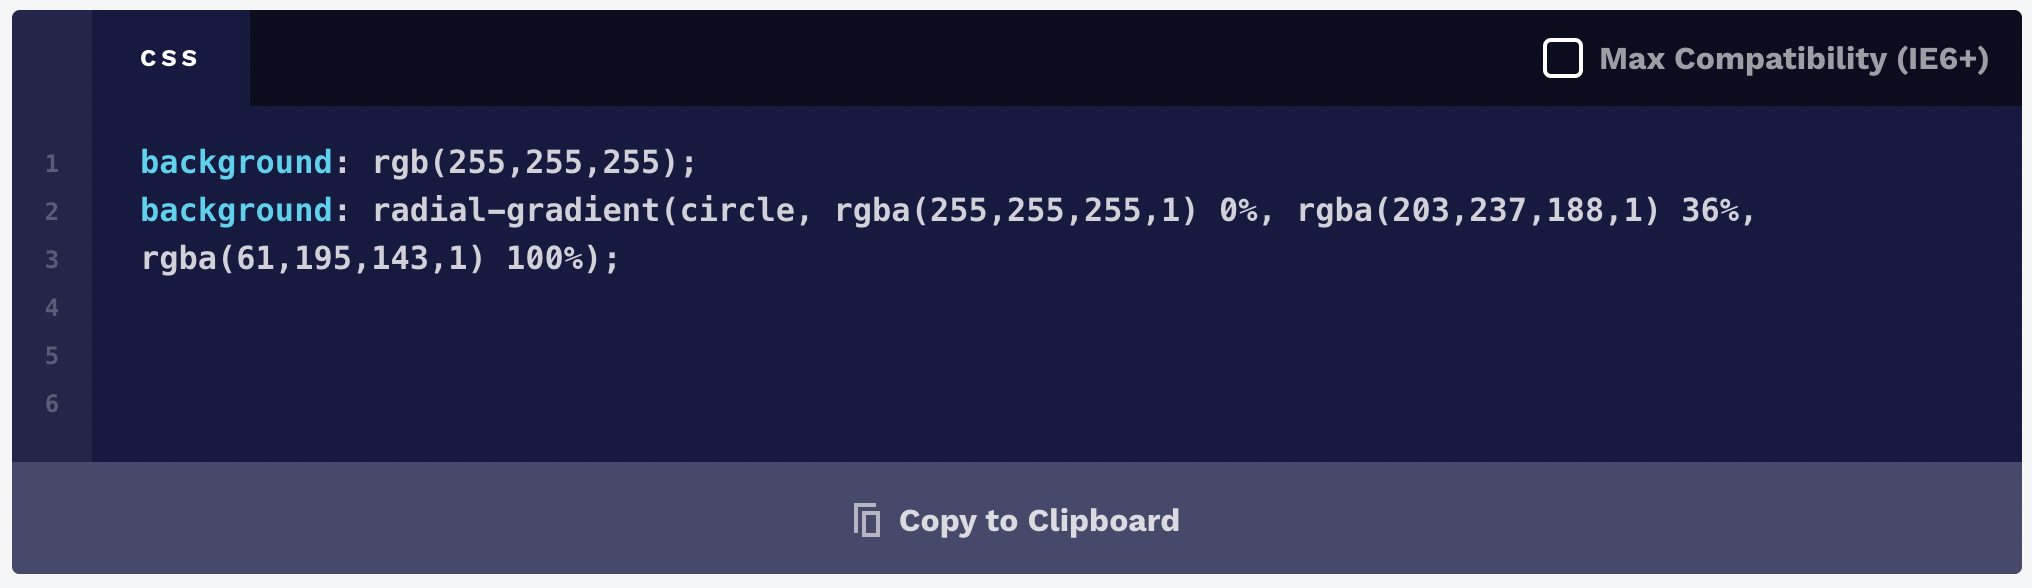
Great work! Now you have a beatiful and dynamic gradient background.
Footers usually contain important infomation like a copyright notice, contact information, logo, and more. Add a footer to your website to improve it's overall usability!
Copy and paste the following code to add a footer (just like the one on the bottom of this website!):
HTML code:
                    <footer>


                    <p class="text-center">Author: {name} | {date} | <a class="footer-a" href="mailto:{email-address}">Contact</a></p>


                    </footer>
CSS code:
                    .text-center {

                       text-align: center;

                       color: white;

                      }

                       .foot {

                       text-align: center;

                       font-family: helvetica, sans-serif;

                       font-weight: 200;

                       font-style: normal;

                       font-size: 1.0em;

                       line-height: 1.6;

                       color: white;

                      }

                      .foot:hover {

                         text-align: center;

                         font-family: helvetica, sans-serif;

                         font-weight: 200;

                         font-style: normal;

                         font-size: 1.0em;

                         line-height: 1.6;

                         color: #3498db;

                         background-color: transparent;

                      }
In the CSS code, the .foot class styles the paragraph and link elements inside of the footer. The .foot hover tag styles what the "Contact" link looks like when it's hovered over.
The <footer> tag should go at the end of your HTML files, just before the closing </body> tag.